Blog Image

DAFOS Photo World

Why??

To catalogue my thoughts and experiences on things photographic and related topics, aiming to promote open-minded creativity and respect that hopefully contribute in some way to general peace and well-living.

Levels or Curves?

Things Digital Posted on Fri, May 31, 2019 20:06:41

Again, based on discussions in the Viewfinders club…

Once you get to the stage where you get your digital photos onto a computer and start working with “image processors” to make adjustments, a question one often hears is “what should I use – Levels or Curves?”. The Questionner is referring to different types of tool that can be used to adjust the rightness and/or contrast of an image. The Questionee’s standard answer is whatever suits you best”. Which is correct though not necessarily very helpful. I’ll try to elaborate on the difference here, without getting too technical.

All photo processing software tools are equal (though some are more equal then others), but they do tend to use their own names for things or operate in slightly different ways to what’s described below. However, the basic principles are the same, and some experimentation will help along the way (remember, digital bits are very cheap, but keep a safe copy of your original photo in case something goes totally west).

Brightness and Contrast sliders.

Most photo editors have two simple sliders called like this; usually right in your face so you can’t miss them. For a first approach they do what it says on the label (some have “Exposure” sliders as well). It is a bit of a blunt instrument though. You can increase the general “brightness” of the image, a bit like the volume control of a radio – you can make it louder (brighter), or quieter (darker), to taste.But then everything gets louder (or quieter if you turn the knob the other way). A good start but lacking some subtlety sometimes. If the music is quiet you may be tempted to turn the knob up a little more, at which point some hissing may become audible. Much in the same way, a “too dark” (under-exposed) image can be boosted up to the point that “noise” can become visible in the picture too.

To continue the analogy with a radio, the Contrast control is a little like a basic “tone” control found on some simple radios. Moving it changes the general tone of the sound (how the highlights sound), and by analogy, the Contrast slider adjusts how the blacks, greys and highlights are related.

The simplest of adjustments, and usually the first (and, to be honest, quite often the only) “tweak” on a photo.

Levels.

Moving up from a simple radio to a classic home “hi-fi” system, you may well find some extra controls – Bass” and “Treble”, and sometimes even “Mid” knobs to twiddle. Bass adjusts the low-end, darker sounds, treble the high-pitched brighter sounds, and Mid (if present) kinda gets freaky with the middle tones (it’s funny that way).

From our analogy again, the “levels” in your photo software will have one control for the “darks” end, one for the bright end and usually at least one for the mid-greys. And these too do what it says on the label. The Black control will control the level (yes) of the blackest parts of the picture, White the top end, and the mid-point control will let you shift the middle grey tones up (brighter) or down (you got it).
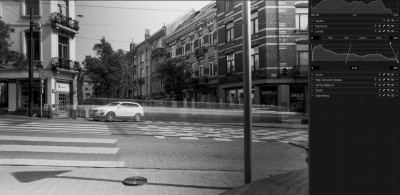
Still not the most accurate of instruments, but it’s certainly very usable.

Curves

This is where we go from the normal household hi-fi audio system to something more resembling a professional recording studio. At least as far as the “tone control” goes, this has now become a set of sliders controlling quite well-defined pitches of sound, giving very precise control of the amount of each one in the sound you hear. The knobs are usually sliders which, when lined up next to each other, can look like a nice, graceful curve (so they call them “graphic equalisers”). Yes, you get where we’re going here now, right?

The “Curves” tool in photo processing would probably be rather cumbersome if it had a slider for each level of grey to be adjusted. Instead, they allow you to define the nice-shaped curve (from which they calculate all the intermediate values required), by adding points along the curve that can be pulled up or down as desired.

Normally, curves are used to give fine control of the appearance of the different tonal ranges in the source image. You can boost (push the curve up a bit) or reduce (pull the curve down a bit) at different places along the histogram at will.

Pulling the lows down a bit and pushing the highlights up (or vice-versa) produces a slight “S”-shaped curve, sometimes referred to as a “sigmoid” (just to be geeky, I think), but which is very effective and intuitive for correcting many images taken in “difficult” lighting conditions.
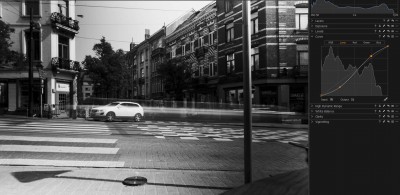
You can also get quite extreme: pushing the “Black” end all the way up to “White” and pulling the White end all the way to Black produces a negative image. Keeping the “White” end at white and pulling down the middle of  the curve gives an interesting “solarisation” effect. Experiment, and observe what happens. It’s the only way!

Local adjustment

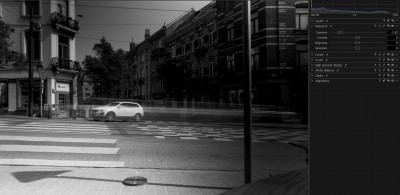
The above description applies changes to the whole of the image. However, most photo processing tools will allow you to apply any of the above adjustments to specific areas only. Often, a “mask” can be drawn by hand (usually shown as a contrasting colour, so you can see what you’ve done – though this colour itself doesn’t appear in the final image of course). More advanced software will also give you all sorts of tools to help draw very precise masks, fill large areas (e.g. the sky,…), etc. etc… Where the mask is painted, the adjustment will be applied, elsewhere not. This allows you to pick out one problematic part of your picture and correct it (face too much in shadow? Just brighten that bit. Here, I’ve darkened the building facades just to show the point).

Back in the days of “analog” printing, you’d use your hands or bits of card with holes cut out to “dodge and burn” the print (lighten or darken respectively) in certain areas, simply by casting a shadow on part of the print, or only exposing one area of the print for part of the exposure time. Tipping the hat to the pioneers of photography, the terms “dodge and burn” are still in common use in digital photo processing today. Some really good tricks like this will never die, I guess…


My Digital Workflow

Things Digital Posted on Wed, April 24, 2019 21:23:29

To try and launch a kind of learning experience around how to make photographs, I thought to describe my own “workflow” and see if this could identify some items for interesting and educational discussion.

Step 1. Take the pictures.

You could say that the processes are different for every single shot you’ve ever taken. For me, as probably for most, it means setting the camera to a basic set-up, from which any special needs can be selected without too much trouble. This may change during a day, depending on the lighting, indoor/outdoor, etc… but it’s a pretty standard way to work. A trick I use which may not be so standard is as follows. I generally favour Aperture Priority mode and set up the camera accordingly. I do take the trouble of  programming a set of Manual settings I can quickly switch to, that can be useful to “save the day”. Typically, settings for using a flash when the rest of the shoot is available light.

Step 2: Get the pictures off the camera.

For this, I connect the camera to my main computer and use the Canon “EOS Utility” to download the photos. You can of course take the memory card out of the camera and use a card-reader to copy the files, but I find that the Canon utility saves me a lot of bother: all orientation information about the shot is kept (portrait / landscape – something I had trouble with in the past), and the photos all end up in a logically named folder in a place I can easily find, without the need for any input from me (I’m lazy).

My computer is set up to automatically take a backup copy of any new files every day on a local drive, and also to my network connected server. This backup also saves the pictures I have worked on. Very handy. I don’t delete the pictures from the card until I next need to use it though – just in case!

Step 3: Selecting and Basic Adjustment.

I power up Capture One Pro, which uses my single, standard “Session” as a default. I don’t have the discipline to tag all my photos, making a Catalogue quite redundant for me. Using this one Session means I don’t have to  “Import” the images or any such step – I can just navigate over to the newly created folder with images and go.

Stepping through the pictures chronologically, I can quickly identify the one’s I’ll probably keep. I do the basic adjustments at the same time (exposure, colour balance, cropping, and usually add some “Clarity”), then give it one “*” if I’m happy with it before quickly moving on to the next.

Most of my pictures are delivered in big batches, so this works OK. If there are any I come across that are candidate for some “special treatment” (like B&W, a print or whatever) I may give it two “**”, just to make them easier to find again.

I have on some occasions used the “Auto” feature to set the baseline exposure etc…, but this takes a while to do on all images, and while it sets up a close reference point, it really doesn’t speed me up much, I find.

Notice I didn’t mention “raw” or “JPEG”. I happen to use raw, because I get a lot more leeway in the adjustments (especially in dark areas where noise could become an issue, or in tungsten lighting conditions), but that’s a personal choice. The same method works for either in Capture One Pro.

Step 4: Output the images.

As I use raw format, the images need to be processed to make them into jpegs. The same is true for any jpeg images that have been adjusted (Capture One Pro uses non-destructive editing – it doesn’t touch the original file – so any edited image must be “processed” into a new file to make it available). For this I have a number of “pre-set” recipes that serve mostly to allow me to quickly create different pixel-count images for different needs. I also have some with a watermark pre-programmed. Each “recipe” saves its processed images in a clearly named folder, in the same folder as the images they came from. I do have a few special ones that saves them somewhere more centralised, for “one-off” edits, or those “special” images with two “**”, should I need them. These would also be the candidates for printing, of course.

For saving JPEG images, I have created recipes for different fairly standard needs. They set the image size (in pixels) and compression factor. These can be to fit a box 400pixels each side, to use as thumbnails, to fit a box 1080×1920 pixels (for an HD-sized computer screen), 1600 pixels longest side for “every day” use (including Viewfinders newsletter), or “100%” for full-resolution images. Oh, and one that fits a box 1400 x 1050 pixels, for projection at Viewfinders meetings! 😊

So, I select all the “*” images and activate the batch queue, with the recipes I want to use selected- Capture One Pro will process several recipes in parallel. Don’t go for a coffee yet, though, because it actually happens fairly fast. As the images all end up in a special folder, it’s then relatively easy for me to upload them to my web-site for delivery, send them in to the Newsletter (hint), or copy them to a USB stick. Or whatever.

For printing at home, I tend not to use Capture One Pro directly (except for sporadic contact sheets etc…). It needs a lot of hand-holding to get nice results, I find. Instead, I use a fairly basic photo manager, and stick to using the standard Canon drivers that came with the printer. I usually get very good results that way. For printing at a service lab, I use 100% size (maximum pixels) and 95% compression factor JPEG. Never had a problem!


Brand Loyalty

General Posted on Wed, April 24, 2019 21:06:35

I recently came across a Facebook discussion about an article on the Interwebs, that was effectively asking what features a specific brand should offer in order to increase its market share. The usual flurried mix of comical nonsense and useful insights followed 😊. This made me think about why it is that new brands (or existing brands toting new technologies) can sometimes have a hard time in this.

“Brand Loyalty” is something that indeed is an important factor, but its importance and reason for existing, at least in my opinion and experience, has little to do with the actual company, and a lot to do with the expectations and demands of the customer base. That customer base is in fact a very broad and very complex entity.

“Sony did it”, I hear you say. Indeed, but only after they acquired Minolta – a company with a long history and experience in the field. And a customer base that appreciated its products.

For full transparency, I am not a “Gear geek”. I happen to use Canon cameras and brand-related kit, because it met (for me) a certain set of requirements when I set out to make photography a source of income for myself. My business was based almost exclusively on “events” – mostly commercial things but also weddings. Though my original ‘choice’ of Canon was dictated many, many years ago by me receiving one as a gift, there were (and still are) several compelling reasons for me to stick with it.

  • Optics. Very expensive items that are probably the one most critical component in the work flow. I have a small collection of pro-grade lenses that together represent a significant financial investment that I could not really justify “doing over”.
  • Job-specific features. The “events” type of work puts great demands on the “camera response time”, often under low-light conditions. So, anything that contributes to “shutter delay” (like focus acquisition, …) is just “no”. The kit I have works well for this, and where it does not, I have learned to control its foibles well enough to get through. The requirements of other types of photography will most certainly be different, but equally imperative to the photographer.
  • Trust. As a small jobbing photographer, you are only ever as good as your last gig. When on a job, the kit must work. Other manufacturers undoubtedly also make good, reliable kit, but am I sufficiently familiar with them to trust a reputation on? (And yes, I do have duplicate kit when on a job, before anyone asks…). It takes a while to build up such a relationship.
  • User Interface. Over the years, one builds up a specific feeling for the tool – that is a camera – that you are using. Having to think twice about how to adjust this or that when on the job can mean you miss that critical shot, and in many cases the moment cannot be done over to let you capture it as needed (think “Wedding…”). The number of  variables here may be small in practice, but it means reprogramming an instinct, which for me takes time and energy I’d probably prefer applying elsewhere.

So, if a new brand or technology is going to tempt me away from my current kit, It would have to be sufficiently compelling to surmount these
factors.


Capture One Pro

Things Digital Posted on Thu, May 25, 2017 18:20:20

Recently, I was asked to give an overview of my favourite imaging processing software at the viewfinders club. This is Capture One Pro. For this I gave a small demonstration of the speed and ease that images can be stored, sorted and adjusted. That sequence seemed quite popular (maybe because of the model! smiley) – it is:

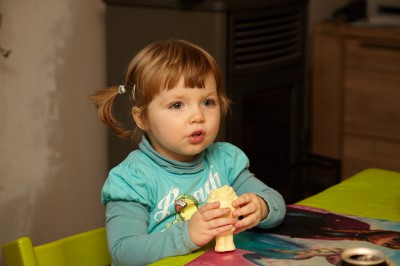
Original image from camera. Not bad, but too much messy background.
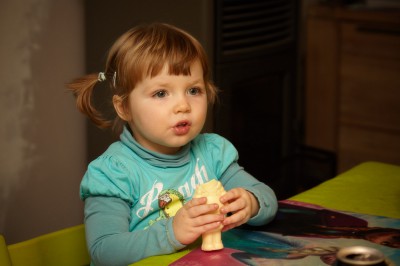
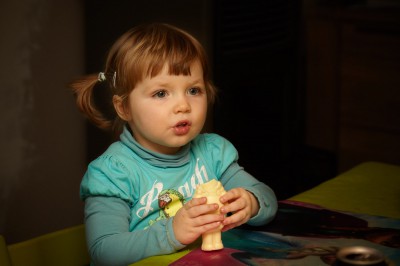
Cropped a bit. Background still too messy for my taste, so …
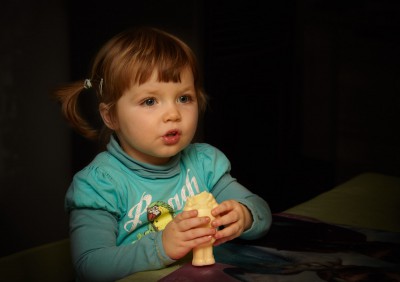
Darken everything ….
Then use a large, soft brush to make a mask to bring up the subject… Not bad!
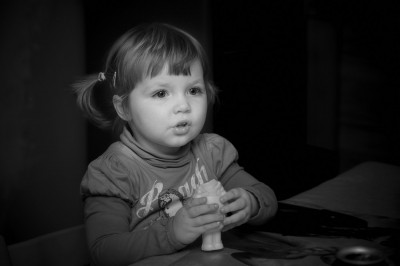
Make a variant of that in B&W – because I said so! smiley
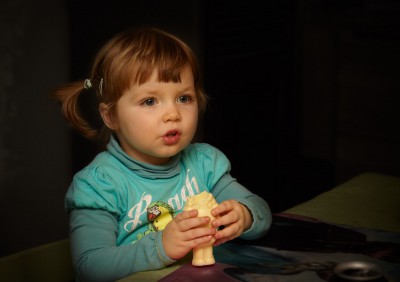
Still just a little more trimming… Can’t quite get rid of that can top in the lower right… smiley
… So use a “healing” mask to brush it away. (I used the face from the other part of the place-mat to cover up the can top, though it’s almost invisible). Et voilà! smileysmileysmiley

(In real time, it took less than 3 minutes to get to a really presentable print. Capture One Pro rules!)